
Project Zomboid Server Connection Guide
Introduction
- If you any suggestions or corrections for this guide, please reach out to us through our support channel on discord here
- In order to play on the server you have to be whitelisted.
- Please send a request either through our Mod Team in Discord or through the support channel listed above.
- It is very important that you reach out to our Mod Team in Discord prior to joining the server so that you can have your whitelist information generated!
- If any of this information is incorrect or inaccurate, it is recommended that you join the Discord and check the Project Zomboid channel here.
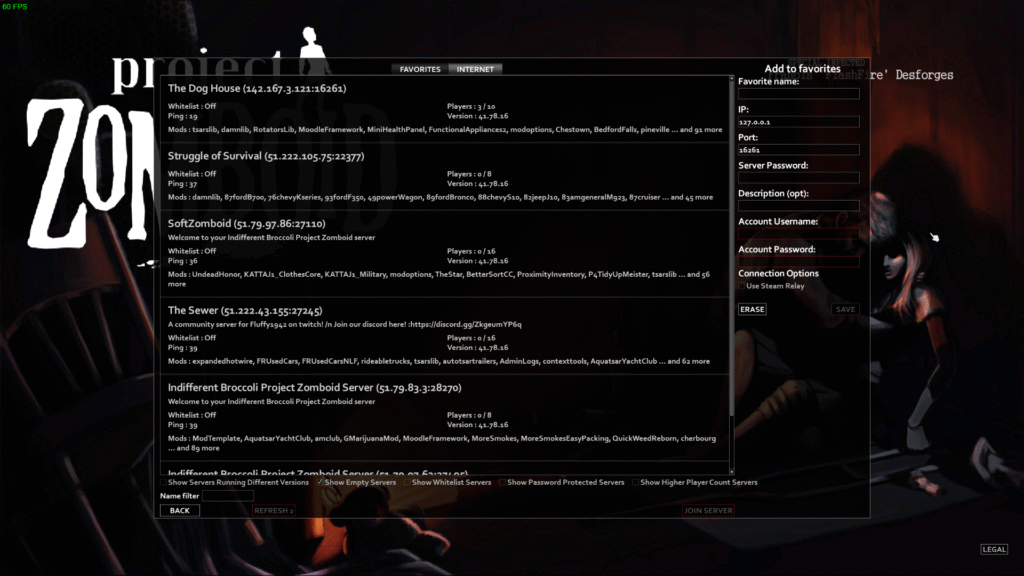
Step 1 – Getting to Server Setup
- Open Project Zomboid
- Click on “Join” in the menu
- At the top of the window, you will have two tabs:
- Internet
- Favorites
- You will see a server list populate, you can fill in the details on the right for our server (Step 2)
- You are now on the Server Setup page and should see the same (or similar) to the screenshot below:
Step 2 – Filling in the Details
- Fill in the Server Connection Details either as shown here:
IP Address: 15.235.55.183
Local IP (optional): leave blank
Port: 12780
Server Password: tnc123
Account Username: Whitelisted Username
Account Password: WhiteListed Password
Connection Options: leave it unchecked
- Or in the screenshot below (on the right side of the screen), whichever is easier for your viewing:
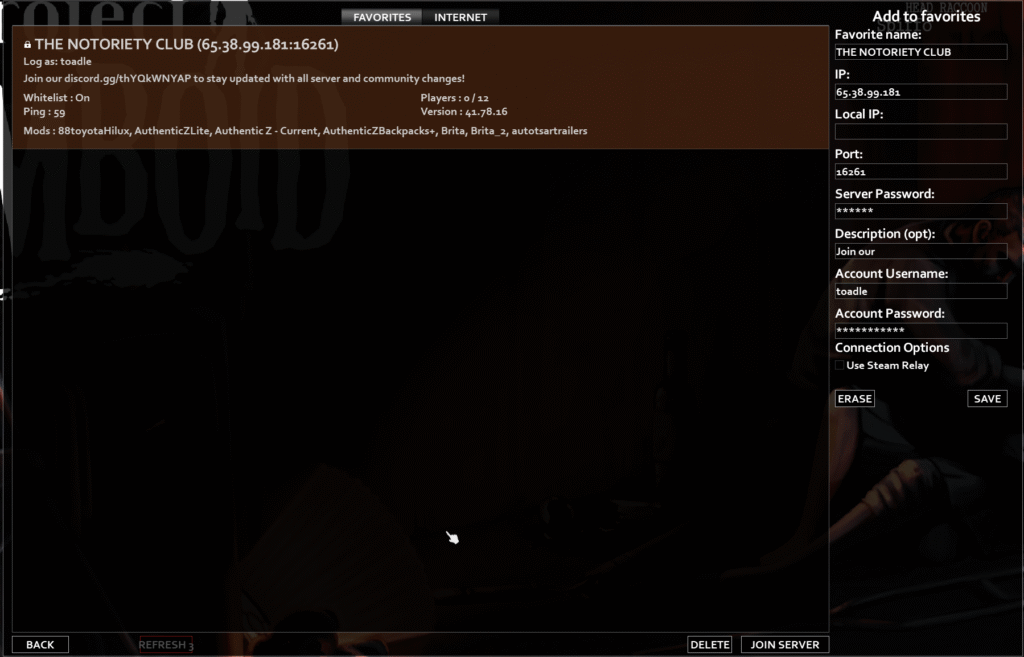
Once you have the details filled in, you can then save the server to your Favorites so when you come back to PZ it will be in there easy to find. Just a reminder that if you don’t know what your Whitelisted Username/Password is, then you need to send a message to the Mods or inside the discord to get this information.
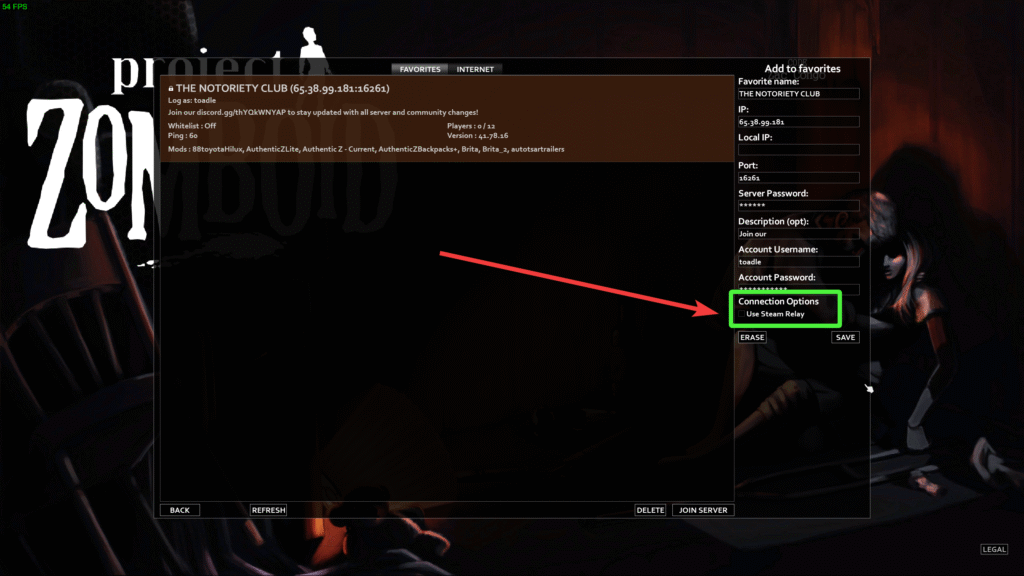
If you are having trouble with connection issues or disconnecting from the server. Enable/Check the box for “Use Steam Relay” under Connection Options as shown in the screenshot below. This should help secure the connection to the Steam Cloud and help with any sync issues.
Step 3 – Downloading and Installing Mods
This is the final step in the connection process. You will be brought to the Mod List Download and Install page. This page will list the mods that we are running on the server and provide you with the option to download, then install the mods.
Make sure you download and install each mod on the list, otherwise you will not be able to connect to the server and play with the community!
Mod List
- For a full list of the mods, please head over to the mod list wiki.
Note!
You have to be whitelisted to join the server. Please reach out to our support staff to get this done before trying to connect to the server. If you try to connect to the server before setting up the whitelist information you will encounter an error.
Version Control
- April 9 2025: Added Note section
- April 10 2025: Added Mod List section and edited the connection details to advise of whitelisted username and password fields
- April 23 2025: Added guide to the website